 EN

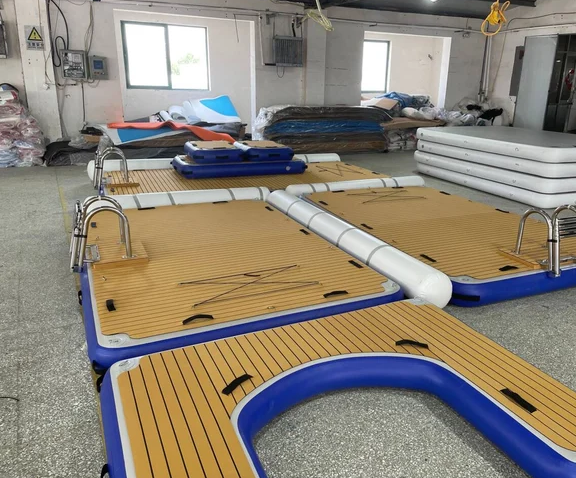
Pick a launch site that lets modules float before they lock
Assembling floating platforms starts on land, not in the water. A flat, shaded staging area close to the ramp saves hours. The surface should be swept, because gravel and shell grit work into connectors and cause misalignment. Measure the ramp width and water depth at the launch point. A platform module that is easy to carry across a dock can be a nightmare on a steep, muddy bank. The best sites have a gentle slope, firm footing, and enough water at the end of the ramp to float the first module without dragging it. Wind matters too. A day with 15 mph gusts will push empty modules around while the crew tries to line up bolt holes. Morning is often calmer. If the site has a current, work at slack tide. A dry run with two modules on land shows whether the hardware kit is complete and whether the connection sequence makes sense. That hour on shore prevents a lot of shouting on the water.
Stage hardware in trays so the assembly flow never stops
Small parts disappear. Bolts, pins, washers, and straps roll off docks and into grass. A simple tray system keeps the assembly moving. One tray for each connection type, labeled with the module size or row number, cuts search time. Keep a torque wrench and a calibrated driver in the tray. Spare connectors should be counted before the launch, not after a missing pin stops the line. For inflatable floating platforms, check valves and pump adapters before inflation. A valve that leaks at the seam will not show up until the module is under load. Lay out the first three modules in the order they will be joined. If the platform has a directional top surface, mark the leading edge with tape. That mark keeps the pattern consistent when the assembly is rotated or towed.
Join the first row on land to set the geometry
The first row sets the geometry for everything else. Connect two or three modules on land where the crew can kneel and see the joint. A straight row is easier to keep square than a row assembled afloat. Push the modules together by hand, then insert the connector or pin. Do not force a joint with a hammer. If the holes do not line up, the modules are twisted or the connector is wrong. Check the seam gap. A uniform gap around the joint means the parts are seated. A tight gap on one side and a wide gap on the other means the module is rotated. Once the first row is square, measure the diagonal. Equal diagonals mean the row is rectangular, which matters when later rows depend on the same pattern. Launch the row at slack water, then hold it against the dock with a line while the next row is prepared.
Match the connector to the load, not to the catalog photo
Floating platforms use several connection styles, and each has a different job. The table below compares common options for modular platforms. Load ratings are planning figures for small commercial platforms, not final engineering values.
| Connector type | Typical use | Strength profile | Assembly speed | Watch for |
|---|---|---|---|---|
| Pin and clip | Light modular docks | Shear load | Fast | Clip wear and loss |
| Through bolt | Heavy duty rows | Tension and shear | Medium | Over-torque and corrosion |
| Ratchet strap | Temporary alignment | Tension only | Fast | UV degradation |
| Cam lock | Inflatable platforms | Tension at seam | Fast | Sand in the mechanism |
A pin and clip is quick, but the clip can catch on ropes and bend. Through bolts hold well, though stainless hardware in saltwater needs the right grade to avoid galling. Ratchet straps are useful for pulling modules together during assembly, but they should not be the only connection in a permanent platform. Cam locks work well on inflatable floating platforms, but sand in the mechanism causes partial engagement. The real failure mode is often a mix of connectors that were not designed to work together. Pick one primary system and use temporary aids only for alignment.
Anchor and tension after the platform is floating square
Anchoring is easier after the platform is assembled and floating in its final shape. Drop the anchor lines from the corners first, then the midpoints. Tension should be even. A platform that is tight on one corner and slack on the other will rack when people walk across it. Use a tension gauge or a marked line to compare loads. In a 2023 lakefront rental project in the upper Midwest, an installation crew found that one corner anchor was set in soft silt while the other three were in sand. The platform looked fine at the dock, but after two days of wind, the soft corner moved and the modules twisted. The fix was a longer helical anchor and a load spreader. The lesson is simple: anchor holding capacity varies across a site, and a single soft spot can steer the whole platform.
Inspect the first load, then set a repeatable check routine
After assembly, load the platform with the expected number of users and watch the joints. Look for movement at the connectors, gaps at the seams, and any line that has lost tension. A short trial with a few people is safer than a full crowd on day one. Check the underside if the water is clear enough, or use a GoPro on a pole. The most common assembly mistakes are crossed straps, missing clips, and over-torqued bolts that crush the module surface. EN 15649 and ASTM F2374 give useful reference points for floating leisure articles and inflatable amusement devices, though local rules still govern the site. A repeatable check list, signed by the crew lead, keeps the process honest. Higher Sports, with manufacturing in Qingdao and a California warehouse, supports assemblers with batch-consistent inflatable platforms, CE and ASTM documentation, and North American replenishment.
Table of Contents
- Pick a launch site that lets modules float before they lock
- Stage hardware in trays so the assembly flow never stops
- Join the first row on land to set the geometry
- Match the connector to the load, not to the catalog photo
- Anchor and tension after the platform is floating square
- Inspect the first load, then set a repeatable check routine